For sales partners
Management of your clients
As a sales partner, you have access to the “ProfondConnect” partner portal. From your account in the partner portal, you can also access your clients’ user accounts as soon as each client has activated your access to their account. Activation automatically gives you access to all of the relevant data and gives you the same ability to make changes and perform calculations as your client. The quick selection (drop-down list) in the title bar allows you to switch from one user account to another.
For data protection reasons, access to the user account of your client must be granted by the client him/herself via “ProfondConnect”. He/she only needs your first and last name and your e-mail address. The client can add your login details at “Delete/register user” in the user settings. Detailed instructions can be found in the description of the user settings.
Login and registration
To use ProfondConnect, you first need to register. You have received an activation letter with your personal code for this purpose. To complete your registration, follow the instructions at “Registration”, making sure you have your personal code at hand.
What if you have not received an activation letter or if the activation code has expired? If so, please contact our customer service department.
How to start using ProfondConnect
You can access ProfondConnect using the following link: https://pc.profond.ch
Registration
In order to be able to use ProfondConnect, you need to register first. You have received an activation letter with your personal code for this purpose.
To offer the highest level of security, ProfondConnect works with 2-factor authentication, i.e. the same as for on-line banking. You must, therefore, also provide a mobile phone number when you register.
Step-by-step guide
- Open https://pc.profond.ch/register.
- Select the language at the top right.
- Enter the personal code shown in your letter and click “Continue”.
- Add your e-mail address.
- You will receive an e-mail with the subject line “Complete user account setup”.
- If you do not receive the e-mail within 10 minutes, please check your spam/junk folder.
Call us if you have not received an e-mail there, either. We will be happy to help you. - Enter the access code in the input window below and click “Continue”.
- Complete the missing information, accept the Terms of Use and click “Next”.
- Set and a secure password and confirm it.
- Please enter your mobile telephone number in the following format and press “Continue”:
Switzerland: +41 (79) 000 00 00
Germany: +49 (174) 1234567
Austria: +43 (000) 1234567
France: +33 (6) 12345678
Italy: +39 (32) 1234567
UK: +44 (7447) 040461 - You will receive a six-digit SMS code
- Please enter the six-digit code and select “Confirm and complete”. If you have not received a code, you canhave it sent to you again at “Send again”. If you do not receive the code within 10 minutes, please call us.
- You can now log in to the portal.
If you have any technical questions, please e-mail your contact person at Profond. We will be happy to help you with technical issues at info@profond.ch.
Linking portals to each other
Do you use ProfondConnect not only as a partner, but also as a company and/or insured person? ProfondConnect makes it possible to link the partner portal with the company portal by providing the same e-mail address when registering. After that, you can switch from one portal to another via the drop-down list in the title bar.
For data protection reasons, it is no longer possible to switch to your insured person portal and back. We recommend that you register with the insured person portal with your private e-mail address. This means that access to your data remains secure in the event of your possible retirement. Even in the case of termination of employment with your employer, you will continue to have access to your data for a certain period of time.
If you have already registered with the same e-mail address and would like to change this, you will find the setting in the user profile.
Forgot password
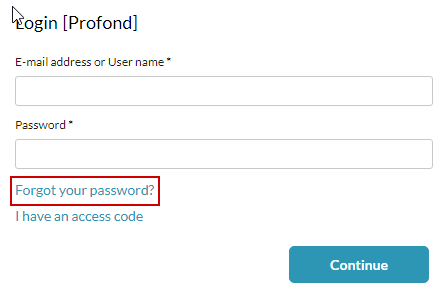
If you have forgotten your password, you can request a new one by clicking on “Forgot your password?”. You will then be able to log in with your new password.
Once you have successfully logged in, you will be asked to set a new password of your own.
Homepage and menu
Homepage
On the homepage, you will find helpful information and new features, details of your contact person at Profond and useful links relating to Profond and occupational pensions. The title bar is located at the top and the navigation area is on the left.
You can drag the column wider for the best menu display.
Title bar
The title bar at the top edge of the screen contains a range of functions, as well as your documents and settings.

1. Menu icon
The navigation column at the left edge of the screen can be toggled on and off using the menu icon.
2. ProfondConnect Logo
Clicking on the ProfondConnect logo will always take you back to the homepage.
3. Quick selection
Using the quick selection in the drop-down list allows you to switch between the different portals. This means, for example, that you can switch from your partner portal to the company portals of your clients. You can read about how to obtain access to your clients' portals under “Client administration”.
4. Tasks
The changes and notifications you have initiated or saved temporarily can be viewed in tasks. Various filter criteria help you to better find the tasks you are looking for. With a double click, you can call up your temporarily saved changes and notifications for further processing.
5. Messages
All of the documents addressed to you can be found in chronological order in Messages. Here again, filter criteria will help you find specific documents.
Once a new document arrives, all of your registered users will receive an automatic e-mail message sent from connect@profond.ch.
6. Three dots menu
By clicking on the three dots alongside your user name you open the user settings and log out of ProfondConnect. Details on the settings can be found in the “User settings” section.
Log out
Always log out when you finish using ProfondConnect. To do so, click on the three dots menu alongside your user name and select “Log out”.

Contracts
Contract overview
In the contract overview, you can see an overview of all connections you manage. This allows you to keep track of all contracts you manage at all times. In the connection list, you will also find the number of active, partially active and passive members, retirement cases, disability cases, and deaths per respective connection, along with the outstanding invoices for the connection.
Order pension overview
You can request a pension overview via the three points at the end of the line or via the button “Order pension overview”. To do so, enter the desired cut-off date, click on “Check” and then on “Submit”. You will receive a PDF as confirmation of your order. The pension overview is automatically provided as an Excel file in your notifications. It contains information on actively insured persons, benefits as well as the vested benefits per calculation date, BVG vested benefits per calculation date and the vested benefits interpolated and BVG vested benefits interpolated (per registered effective date).
User settings
At the right of the title bar you will find your user name that you used to log in. Clicking on your user name or the three dots menu opens the menu for the user settings.

User profile
In the user profile you can modify your user settings.
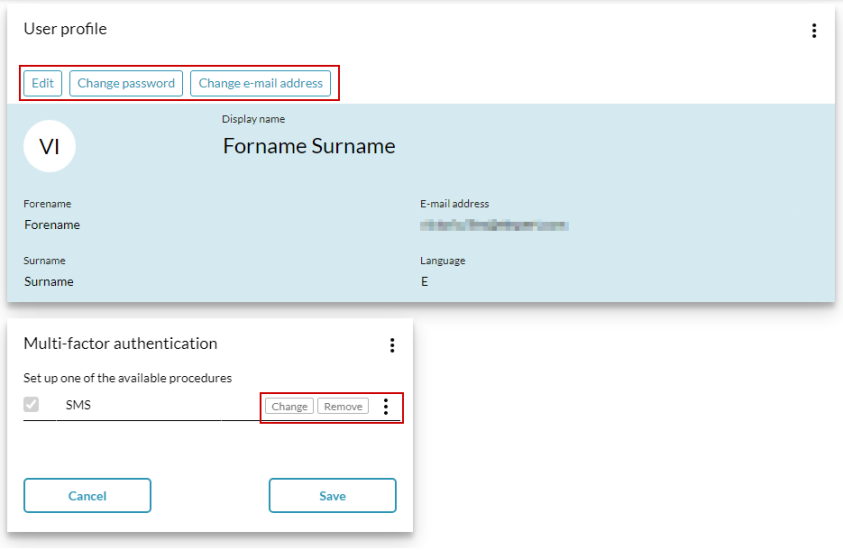
- User name and language settings
You can use the “Edit” button to change your user name, your name and the language setting for ProfondConnect. Please note that these changes will not be activated until the next time you log into ProfondConnect.
- Change password
Click on “Change password” to set a new password for ProfondConnect.
- Change e-mail address
To change your e-mail address, click on the “Change e-mail address” button and enter your new e-mail address into the form.
- Set up 2-factor authentication
ProfondConnect works with 2-factor authentication to give you the highest level of security. If you have not set it up yet, under the title “Multi-factor authentication” click on the “Change” button and follow the instructions. If possible, set up 2-factor authentication when registering as a new user. See the chapter “Delete/register user”.
- Change telephone number
To change your phone number, under the title “Multi-factor authentication” click the “Change” button.
Delete/register user
Enter new user
Click on “New” to access the entry interface.

Enter the e-mail address and click “Next”. Now proceed as follows:
- Enter the first name, last name and language of the new user on the following input screen.
- Also enter the desired permissions here. New users can only be added by people with the “Connect Administrators” permission level.
- Under the title “Multi-factor authentication", click on “Set up”.

2-factor authentication
To offer the highest level of security, ProfondConnect works with 2-factor authentication, i.e. the same as for on-line banking. To complete this step, you need the support of the person to be registered. Enter the mobile phone number of the new user. The newly registered person will receive an SMS with a six-digit code. Enter it, confirm with “OK” and save the input.
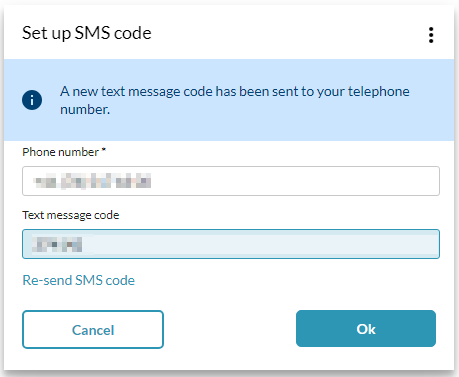
Confirm your identity again with your password. Now the new user can log into ProfondConnect.
If the e-mail address you enter has already been saved in the system (e.g. for partners who manage several affiliations), you will not need to register a new user and the partner will be able to start using ProfondConnect directly.
Logging in as a new user
As a newly registered person, go to https://pc.profond.ch/ and click on “Forgot your password?”, so that you can set your password.

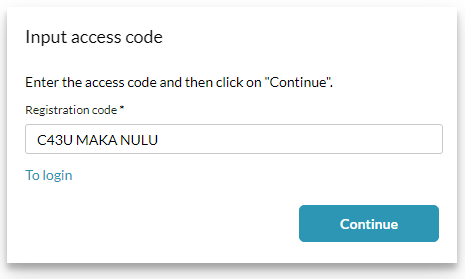
Enter your e-mail address and select “Continue”. You will receive an e-mail with an access code. Enter this in the following window and confirm again with “Continue”.
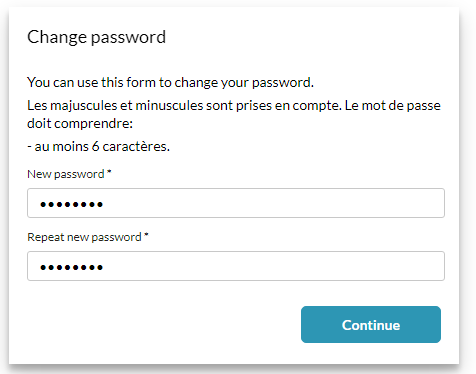
Once you have successfully logged in, you will be asked to set a new password of your own. After that, you will be registered successfully as a new user.
Editing details for existing users
Under “Delete/register user” you can amend the information for existing users. To do so, mark the relevant line in the last and select “Detail” to access the amendment interface.

- Amend the first name, surname, display name, language and theme permissions
By clicking on “Edit” (below the title), you can amend the first name, surname, display name, language and theme permissions. Then save your changes.
- Amend mobile phone number
To amend the mobile phone number, under the title “Multi-factor authentication” click on the “Edit” button and enter the new number.
- 2-factor authentication
If you haven’t set up 2-factor authentication yet, you can add it. Save your selection by clicking “Save” and follow the instructions.

Block user
Access to ProfondConnect can be blocked for a user under “Delete/register user”. To make this change, you will need “connect-Administrators” rights.
To do so, mark the relevant line in the list and select “Detail” to access the amendment interface.

Click on “Edit” (below the title), tick the box “Disabled” and save your entry.

Client administration
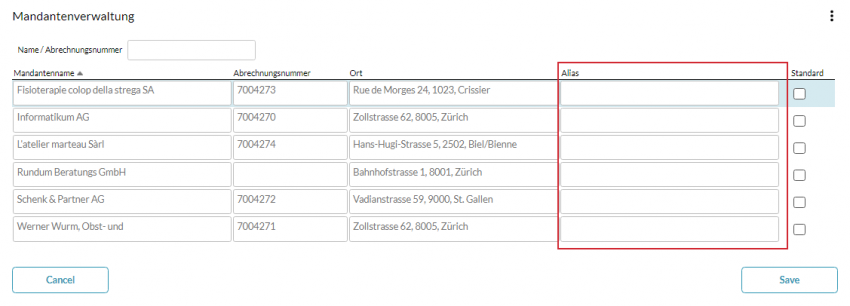
In the client administration area, you find all of the clients you manage and further user accounts to which you have access. The list corresponds to the selection in the drop-down menu of the quick selection (in the title bar). You can add an alias name to the individual clients. Afterwards, the aliases will be displayed in the quick selection.
